With a walmart vacuum.I prevacuum too
You are using an out of date browser. It may not display this or other websites correctly.
You should upgrade or use an alternative browser.
You should upgrade or use an alternative browser.
If you could add features to this board, what would they be?
- Thread starter Mikey P
- Start date
Nate The Great
Member
I love what I started.
Remove the fake word prespray
I'm glad someone is listening to Woody..... Our resident special trailer friend..

Prespray, pretreatment, cleaning agent, cleaning solution, detergent, soap cumbobulator, the customer doesn't care how the sausage is made, just get it done with the least amount of residue left behind..
Kenny Hayes
Member
No one is listening to Woody and he don't pull a trailer any more. Pay attention!
hogjowl
Idiot™
He did though. That’s something that marks you forever.
Cleanworks
Moderator
So, does that mean those areas covered by furniture are closed?That’s open areas in Bama
hogjowl
Idiot™
No. It means they’re covered by furniture.
Bryce C
DFW
I'm glad someone is listening to Woody..... Our resident special trailer friend..
Prespray, pretreatment, cleaning agent, cleaning solution, detergent, soap cumbobulator, the customer doesn't care how the sausage is made, just get it done with the least amount of residue left behind..
My customers are happy regardless, because they like my wife. This is mostly about how I feel. And I feel like only 1 of those words for detergent isn't gay, and that's detergent.
I'm not leaving much behind, even when I was using my portable. But now with the truckmount holy smokes. I just did a deodorization service in 3 rooms of carpet yesterday. The place was trashed and stunk like ancient dog piss. Gnarly spots and soiled areas everywhere. I soaked the carpet with deodorizer, followed it with detergents, lots of crb action x2, and set my heat to inferno. Spots and soiled areas look new, like brand new. The horrendous dog odor was completely gone, and I couldn't even smell the slightest trace of the fragrance from the deodorizer. Ridiculously effective extraction. I'm amazed at how much of a difference kickin heat makes.
Bryce C
DFW
I've been following this thread, and to me at least, it seems a few of you might be concerned that The Cleaning Standard will ruin what was once a fun and informative place for you all to visit and chat with each other.
In light of that, I've suggested that this room stay intact for all of you (or "y'all"in southern parlance) to have what you've had.
You can share technical stuff, but still derail threads to your hearts' content, and mildly rebuke each other as "idiots", "hacks", "goobers", or similar terms of endearment.
This will be for MB alumni only.
Amen Jim. That's exciting to hear, thanks for putting in a good word for us goober hacks!
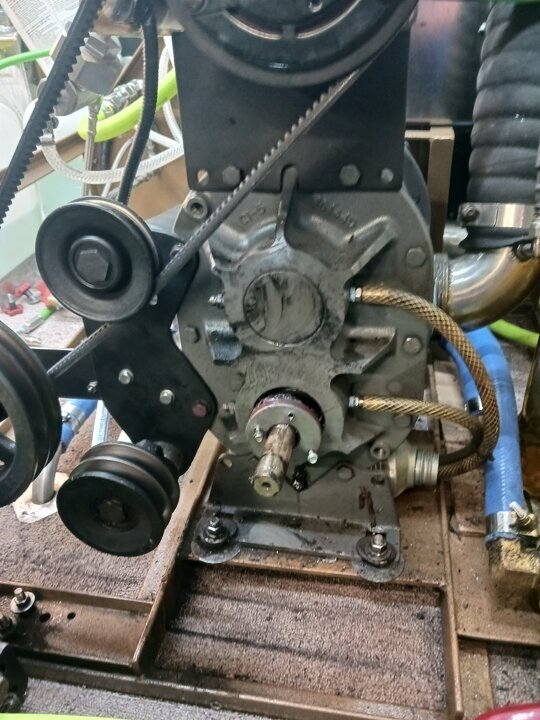
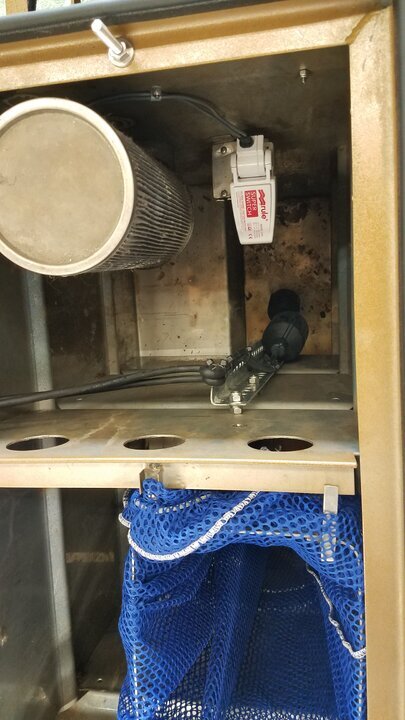
Design, for instance drive shaft, straight with inner and outer only 2 bearings easily rebuild no ujoints. Belts are adjusted with camed idler pulleys 2 cresent wrenches 1 bolt from start to finish less than 5 minutes ( including removing and installing covers)Wastetank/ solid stainless steel. Standard steamgeni uses starvation for chemical feed,no chemical pump and related parts (lines,valves,check valve etc.) Instead of a throttle controller steamgeni uses a somple solenoid( but only has high&idle). Acess front and top covers remove for complete access to all components. Its not that things don't wear out and need repairs. Its that everything is open and easily accessible. All machine components control panel, everything is in 1- 3'×3' box behind the drivers seat also when things need repaired or replaced, you can do it without standing on your head the difference between working on a steamgeni and working on yours is like the difference between changing spark plugs on a car built in the 70s vs. finding and changing plugs on one built today plus the added longevity of stainless construction. In short they are built to be repaired not replaced. Keep in mind when showing pictures of frankinstien ive added chemical pump, salsa heat, dual chemical tank valve dual wastepump float switches,throttle controller/ remote start/stop on machine and on the pressure pump. Blower Tachometer etc etc In short theres a lot more shit in the 3×3 box than a stock steamgeni, and still you can see and acess all components easily. I have a near stock one as a spare. Maybe this weekend if i have time ill pull the covers off and take some pics and put um side by side woth frankinstien. To show how much more simpler the stock ones are
View attachment 132436 View attachment 132438 View attachment 132439 View attachment 132440
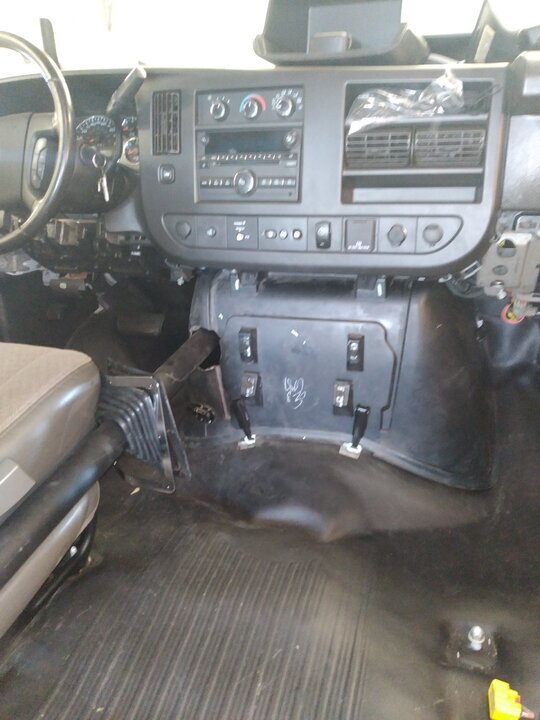
That's cool Dwain-o. I really like the adjustable belts with the idler pulleys, and the simple driveshaft construction. I will challenge you on something though, I think this CDS 4.8 is even more accessible than your sexy Steam Genie. If we consider removing your panels on par (or close enough) with removing my driver and passenger seats, then it seems to me my layout is way more open and accessible as it is spread out across the space between the driver and passenger seats as well as about 20" or so behind each of those seats, like wide open, rather than stuffed in a box. I'll remove the seats and share some pics tomorrow.
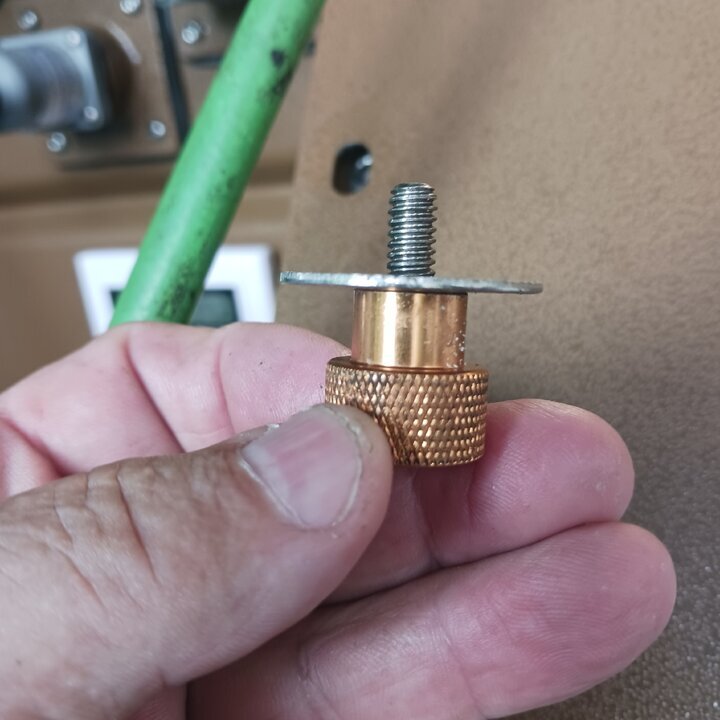
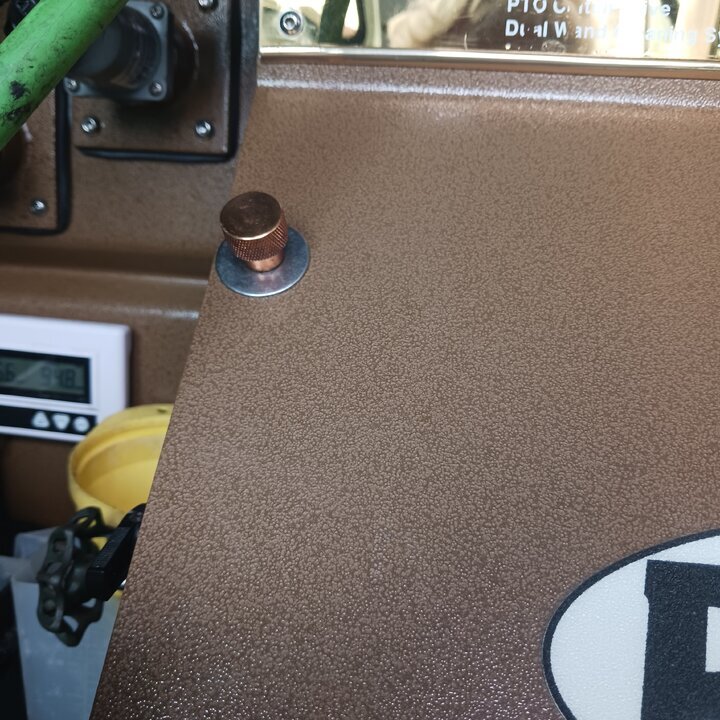
Not even close.top panel slides off (no screws and front of machine has giant thumb screws. I can open up my machine probably quicker than you can remove the fiberglass top between the seats. I can also if needed remove the drivers seat and pull the side cover there too if necessary. Ive only done that to replace blower front seal ( instead of removing the blower to do it)Amen Jim. That's exciting to hear, thanks for putting in a good word for us goober hacks!
That's cool Dwain-o. I really like the adjustable belts with the idler pulleys, and the simple driveshaft construction. I will challenge you on something though, I think this CDS 4.8 is even more accessible than your sexy Steam Genie. If we consider removing your panels on par (or close enough) with removing my driver and passenger seats, then it seems to me my layout is way more open and accessible as it is spread out across the space between the driver and passenger seats as well as about 20" or so behind each of those seats, like wide open, rather than stuffed in a box. I'll remove the seats and share some pics tomorrow.
Cleanworks
Moderator
I thought it would be an open and shut case.No. It means they’re covered by furniture.
SamIam
Member
That's called pressure washingHey....whose never sprayed a baseboard or two.......?
SamIam
Member
Yeah Woody's Mom is getting gonna pre spray his shorts with shtain remover.I'm glad someone is listening to Woody..... Our resident special trailer friend..
Prespray, pretreatment, cleaning agent, cleaning solution, detergent, soap cumbobulator, the customer doesn't care how the sausage is made, just get it done with the least amount of residue left behind..
Dang Woody you stained yur shortz again?
Shpakel Boy
Marty still covers his couch in Alabama with plasticSo, does that mean those areas covered by furniture are closed?
Nice tv, i jad a microwave that looked just like it
Nate The Great
Member
Grandma was a squirter..

Rob Grady
Member
Nice! Clean ! FingernailsNot even close.top panel slides off (no screws and front of machine has giant thumb screws. I can open up my machine probably quicker than you can remove the fiberglass top between the seats. I can also if needed remove the drivers seat and pull the side cover there too if necessary. Ive only done that to replace blower front seal ( instead of removing the blower to do it)
View attachment 132441 View attachment 132442 View attachment 132443
Bryce C
DFW
Not even close.top panel slides off (no screws and front of machine has giant thumb screws. I can open up my machine probably quicker than you can remove the fiberglass top between the seats. I can also if needed remove the drivers seat and pull the side cover there too if necessary. Ive only done that to replace blower front seal ( instead of removing the blower to do it)
View attachment 132441 View attachment 132442 View attachment 132443
I admit it takes me SLIGHTLY longer to open it all up. Although I have a ratcheting 18mm wrench and 2 bolts holding down each seat, and 95% of the time I only need to remove the passenger seat. I've gotten pretty quick at removing the plastic dog house covering the power pack, 15 seconds, with both the seats still in place.
My challenge however was, once the passenger seat and dog house is all removed, my setup is more open than yours Dwain-o. I'd guess for a machine that is still in production, my CDS 4.8 might be the most easily serviceable one on the market.
Last edited:
Nate The Great
Member
I admit it takes me SLIGHTLY longer to open it all up. Although I have a ratcheting 18mm wrench and 2 bolts holding down each seat, and 95% of the time I only need to remove the passenger seat. I've gotten pretty quick at removing the plastic dog house covering the power pack, 15 seconds, with both the seats still in place.
My challenge however was, once the passenger seat and dog house is all removed, my setup is more open than yours Dwain-o. I'd guess for a machine that is still in production, my CDS 4.8 might be the most easily serviceable one on the market.
The aluminum waste tank is the Achilles heel.. It's not if it leaks, it's when it leaks..
Bryce C
DFW
The aluminum waste tank is the Achilles heel.. It's not if it leaks, it's when it leaks..
Nate The Great
Member
You'll develop pinhole leaks, most common under the APO automatic pumpout.. You can try to put epoxy but still need to remove the tank from the van..
Others have had welders weld a new aluminum sheet to the bottom and up the sides about 6"..
HM uses proprietary parts on their machine.. Take the blower for instance, dual shaft.. But yes, it's still in production and the slimmest one on the market..
Others have had welders weld a new aluminum sheet to the bottom and up the sides about 6"..
HM uses proprietary parts on their machine.. Take the blower for instance, dual shaft.. But yes, it's still in production and the slimmest one on the market..
Your machines old enough, If you pop the tank covers you should be able to see the pitting inside the tank. The areas with the most pitting is where the leaks will start first. Generally speaking when they start leaking its all downhill from there as soon as one hole is patched another will start. Don't get me wrong a stainless tank can and sometimes do leak too. But what happens to them it is stress cracks from decades of oil canning (expanding and contracting under vacuum) . In addition to corrosion aluminum tanks are subject to this also. oil canning is easily fixed by eighter drilling a hole at both ends of the crack(to stop it from continuing after welded) and welding or a welded patch. This is what the inside of a 25 year old stainless tank looks like. Before i built Frankenstein i went to the Las Vegas convention armed with a pre-approved loan of 135k @5.29% to buy whatever machine and van or box truck my little heart desired. I spent every open hour of the conventions trade show combing over every machine that was there. including the hydramaster cds (which was 1 of 3 of only ]machines i considered buying) In the end instead of coming home with a new machine i came home disappointed with what was being pedaled . Replacing a perfectly good running 25+ year old machine with one with a life expectancy of 8-10 years (with a 5 year payment plan mind you) just didn't set well with me. So instead of coming home with a brand new machine, i returned with ideas of how to take a 25+ year old machine and get 25 more years outa it with modern technology incorporated. And frankinstien was conceived. I could have bought anything ( and with 100% financing) instead i choose to spend a year and use my own money(no financing for home builds) to come up with what i have now. And ive never for a second looked back on my decision with any regret.Where does it typically leak from? Is it straight out of the bottom? What if I prevent it from jamming the drain valve and pour epoxy the bottom of it preemptively, or something....
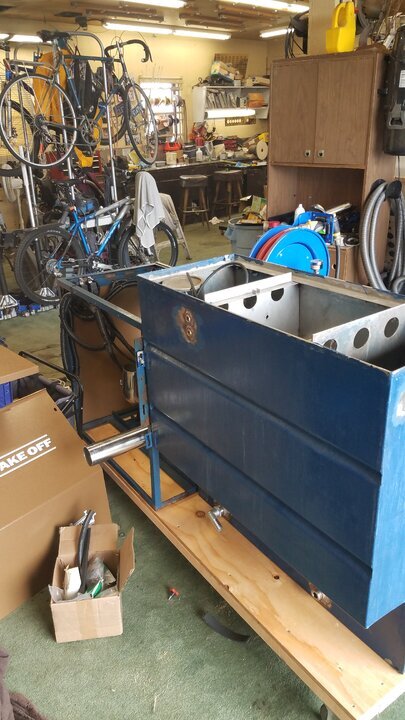
Last edited:
hogjowl
Idiot™
Jimmy’s aluminum tank on his Quad 56 developed a leak. He just poured epoxy into the tank and it stopped it.
SamIam
Member
Where's Jimmy?Jimmy’s aluminum tank on his Quad 56 developed a leak. He just poured epoxy into the tank and it stopped it.
Is he ok?
icleancarpetz
Member
Respectfully,
Wild Horses are out of the barn….90% have no respect to order…ah little too late.
Now you have AI running amuck at its infancy.
The only great thing , you will do well in your local area if youve been setting your self from the wild pack. Cause the pack dont care about order and proper training. Opting to google, youtub and facebook on how to boil an egg or open a box of cereal.
But then you have to wade and sift thru the wolves waiting along the path.
Respect to all my past trainers instructors….it has made a huge different on the field. The one that sticks out the most…Barry Costa. Thank you man! My confidence level has skyrocketed…i can just look at it and…”Yes i can fix that!”
That's like putting stop leak in a radiator. It'll work for a while but i wouldn't count on it as a permanent fixJimmy’s aluminum tank on his Quad 56 developed a leak. He just poured epoxy into the tank and it stopped it.
I forgot about that dual shaft blower.You'll develop pinhole leaks, most common under the APO automatic pumpout.. You can try to put epoxy but still need to remove the tank from the van..
Others have had welders weld a new aluminum sheet to the bottom and up the sides about 6"..
HM uses proprietary parts on their machine.. Take the blower for instance, dual shaft.. But yes, it's still in production and the slimmest one on the market..
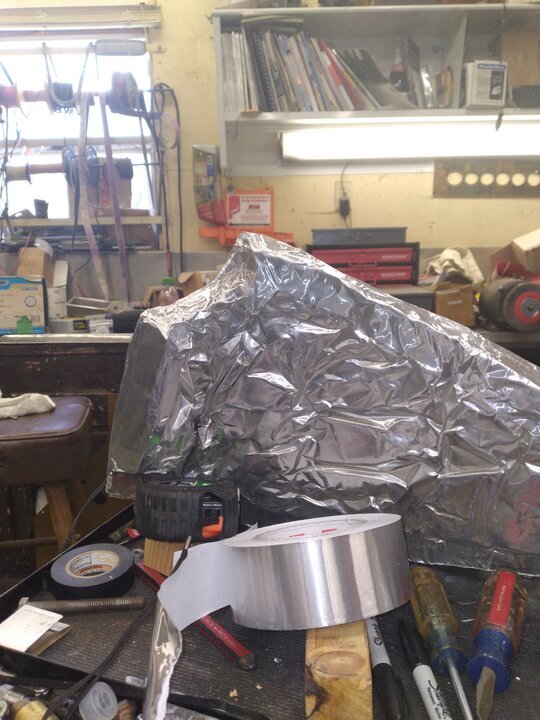
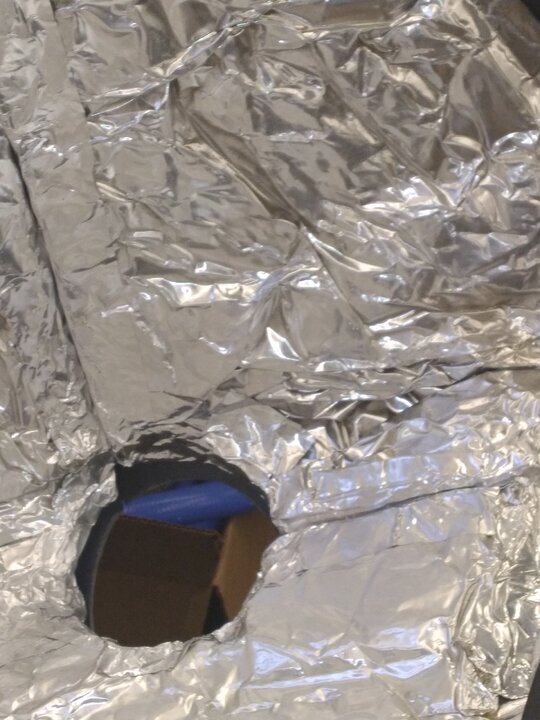
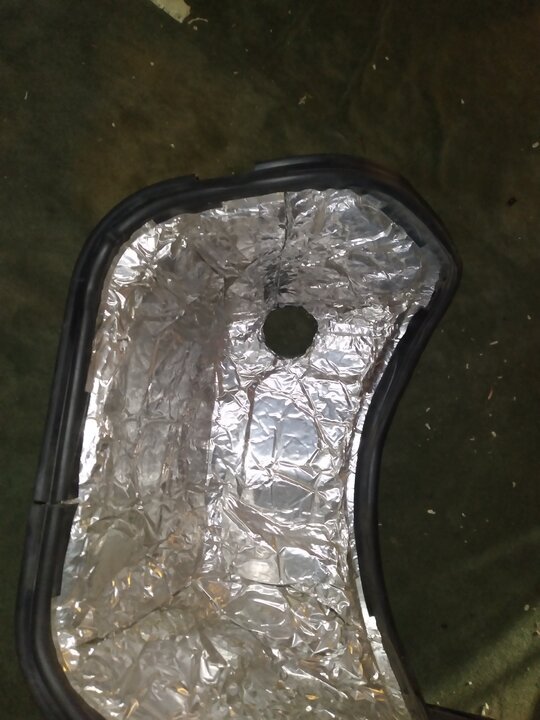
For me the driveshaft and aluminum tank was what sold me against the hydramaster unit butler, sapphire scientific and cleanco all used the same straight driveshaft in their ptos but it is a 3 bearing shaft that is not as easily rebuildable as the steamgeni 2 bearing shaft is. If i went on looks alone the sapphire scientific won it was pretty, but it was also too new to market. I think they discontinued it after only a couple of years. Butler had alot of strange things for instance how components were piled in and ontop of each other and inorder to prime the chemical pump was a big process compared to all other machines (slide-in and pto's) cleanco was another machine that i considered ( and used alot of technologies from in frankinstien) but in the end it had an aluminum wastetank and the over all look of the machine was really really dated. It screams late 60s early 70s compared to the sapphire scientific and hydramaster. However i did end up using cleanco's new version 2 tank water to water heat exchanger, modified engine and rear driveshaft mount and coolant taps. And extensive use of cleanco's 166 page pdf installation manual as reference for instance to professionally cut the dog house engine cover for the pto driveshaft . But when the show was over i went back to the good ole tried n true steamgenis.
hogjowl
Idiot™
He’s out of the business now and spends his time smoking in the garage.Where's Jimmy?
Is he ok?
hogjowl
Idiot™
It lasted a good ten years until he sold itThat's like putting stop leak in a radiator. It'll work for a while but i wouldn't count on it as a permanent fix
That's good . My experience with epoxy repaired pinholes and cracks has been on old steel tanks and the flexing of the tank and or rusting underneath it caused the epoxy to eventually pop off in chunksIt lasted a good ten years until he sold it
hogjowl
Idiot™
It was on the floor. Wonder how much it flexes?


